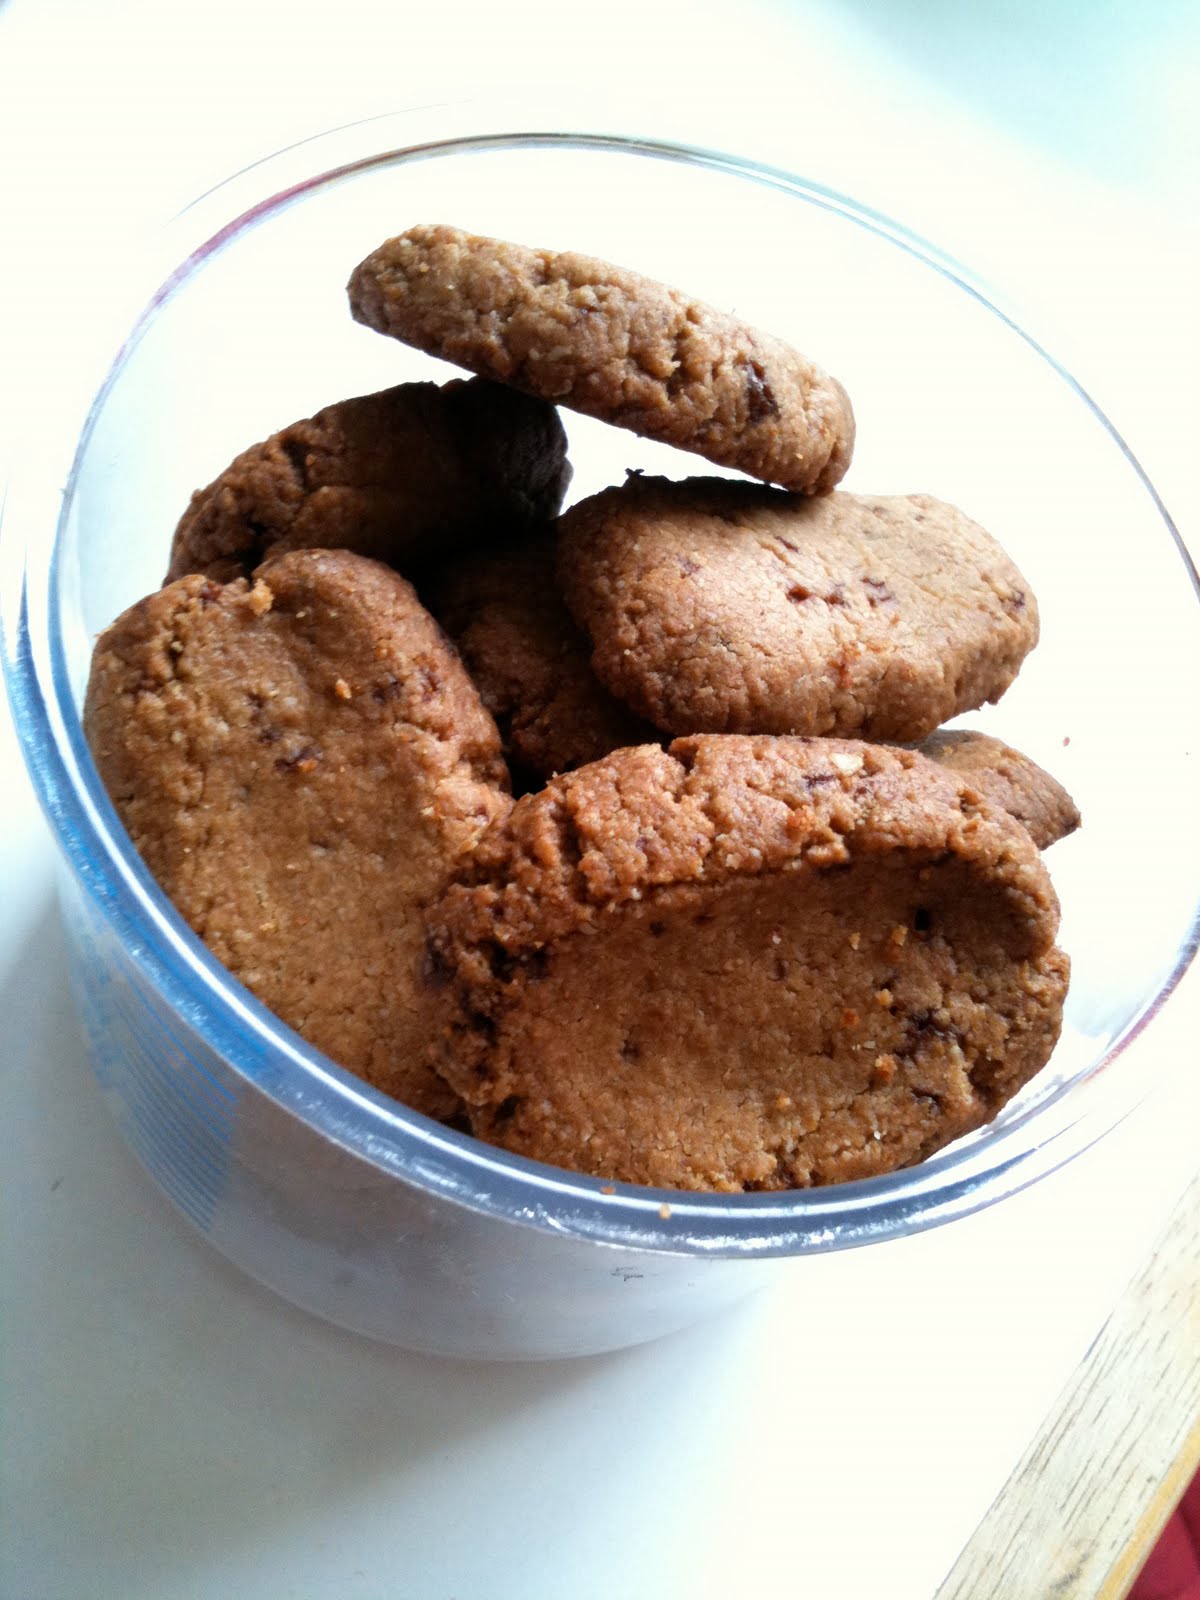
These cookies will make our festive days complete. Eid Mubarak!
Showing posts with label baking. Show all posts
Wednesday, August 7, 2013
Kastengel NCC
We (my daughters and I) made these cheese cookies yesterday night and we had so much fun. As usual, the girls helped me working with the cookie cutters :) They were so happy. I chose the flower shapes (standard & tulip) because I knew my girls would love that idea. And yes, they did.
Friday, July 5, 2013
Peanut Butter Cookies for A Teacher
Not only for E's teacher but also for all people that assisted/helped in E's class. So we made 4 gifts. Peanut butter cookies in 4 mini jars. The recipe? Of course from my favorite one, NCC recipe. Yummy and very yummy...
The fun part was, E helped me in the making process. She was not feeling well today so she stayed at home. I asked her to participate in preparing the cookies. As usual, she said yes :) We delivered all the cookies to the school before they were leaving. Yey, it's done!
Happy summer holidays!
Thursday, April 11, 2013
My Little Star's Bday
It was three days ago and the birthday was celebrated at her school. I think I like the idea of celebrating my kid's birthday at school... Making my life easier :D
So, compared to last year's birthday, this year we only prepared 2 yoghurt cakes with chocolate, 26 sachets of chocolates and bought 4 liters of orange juice. We took all to the school in the morning and voilà... done. When I picked her up after school, my daughter looked very happy. That was her first time celebrating her birthday at school.
One thing that made her birthday different was... the Tinkerbell theme. The second cake was decorated with a Tinkerbell & Periwinkle cake topper (rice paper). The sachets of chocolates were with Tinkerbell pictures inside (I printed those pics). The paper bag to carry the sachets was a Sephora bag covered with Tinkerbell picture(so we couldn't see the Sephora logo). And on that special day, my little star was wearing her Tinkerbell t-shirt... :D
A simple birthday but it gave a big result.
Happy birthday, my dear... Love you always...!
PS. And this is what I did with the birthday cake leftovers. Cake pops! I just mixed the cake in a food processor, added some Nutella and a little bit butter. Then my little one and I made cake pops... Yum, yum...
Saturday, March 2, 2013
Brownies Mr. Oliver
Feeling better now after 2-day KO. Bye flu... Now I can enjoy one slice of brownie. Thank you, Jamie Oliver for the recipe :*
Thursday, August 9, 2012
Not really Kastengel
The recipe was taken from NCC but I changed the Edam cheese with the goat cheese. Delish!
Oh yes, my girls helped me making these. They were so happy!
Saturday, April 7, 2012
Funny Cake Balls
Funny? Why? Because the cake itself was not as good as I wanted. Not moist, not yummy. But I believe it's healthy since the ingredients are healthier than usual. For the sweet taste, it used honey. For the red color, it used beet. Check the original recipe at Weelicious site, ok? It's about beet cupcake, I think.
I made a mistake in preparation. I can't tell you more, too ashamed :(. So the result was not okay.
Then I mixed all with some nutella to make cake balls. And here was the funny part. My girls and I made a trial with the decorating color ~ white chocolate, melted, then mixed with red & yellow food colorants. After we pour it on the meat-look-alike balls, Hahaa! All the cake balls looked like meat balls with sauce. My big girl said: "Hm, suddenly I want spaghetti with meat balls".
Ok then, I decided to add some sprinkles on those balls. Prettier now.
Well, anyway, it was fun.
I made a mistake in preparation. I can't tell you more, too ashamed :(. So the result was not okay.
Then I mixed all with some nutella to make cake balls. And here was the funny part. My girls and I made a trial with the decorating color ~ white chocolate, melted, then mixed with red & yellow food colorants. After we pour it on the meat-look-alike balls, Hahaa! All the cake balls looked like meat balls with sauce. My big girl said: "Hm, suddenly I want spaghetti with meat balls".
Ok then, I decided to add some sprinkles on those balls. Prettier now.
Well, anyway, it was fun.
Friday, April 6, 2012
Saturday, March 24, 2012
Food!
Event arisan & ultah itu adl moment untuk cuba-cuba resep dan/or memasak makanan yang ngga sering saya buat. Trial resep ini, itu, dan pd akhirnya resep2 tsb belum tentu juga dipilih utk disajikan saat event berlangsung.
Pokoke fun di dapur...!
Friday, December 9, 2011
Thursday, May 19, 2011
My Lil One Birthday
I forgot to post the birthday's crafts in this blog but I have posted some photos in here (sorry, not for everyone).
Now, I'll try to remember all I prepared for the birthday. First, you have seen the Cake Banner as shown at previous blog.

Second, I made the Mickey Mouse's cake. It was carrot cake and cupcakes, covered with almond paste and fondant in red, black and yellow colors. I decorated the cake with some Mickey's heads shaped by using some round things I had in the kitchen (fortunately, I had some bento stuffs that I could use).
The cupcake wrappers were printed from this site. And some were just made from scrapbooking papers (I copied the pattern with a carbon paper and then cut them). For the bottle wrappers, I made it by using Scrapbook Flair software and some freebies I found in the internet (forgive me, I can not remember the site).

And one little thing, the food tag. It was made also by using Scrapbook Flair software and some embellishment from A Grieving Mommy (thank's again!). I printed the food tags in photo papers. But finally I did not use them because they were too cute ^_^ Kidding. We did not really need them since I did not serve so many food.

Third, for the deco of the windows, I made Mickey's heads by using felt fabrics that I had at home. The pattern was easy to find in the internet. The happy birthday banner on the wall was bought from eBay UK (not in the photo).

Fourth, the goody bags and the Mickey's biscuits. The tote bags were so simple. I made the applique with felt fabrics in blue and green color. Since the cotton fabrics were limited (I tried to use fabrics available at home, not bought new ones), so the results were only 4 tote bags. Two were with blue Mickey's head appliques. Another two with the green. My mother-in-law helped me to sew the rest while I concentrated only on the appliques and the cuttings. I also put inside the goody bag: a sticker, a Playhouse Disney pencil and a bottle of bubble soap with Minnie wrap (Scrapbook Flair software).
The biscuits, they were made by my handmade cookie cutters in this blog. So cute, right? When I cut the dough with the cutters, the shape looked unperfect. But after going out from the oven, all cookies looked perfect: Mickey's heads. It would be nicer if I decorated with icing or chocolate, but I did not have the time.
One thing that was a must, the Thank You Cards. I also made it by using Scrapbook Flair and with embellishment of A Grieving Mommy (Denise is really kind and talented! Big thank's, Denise! Without you, I would not be able to make those cute stuffs).
Voila, c'est tout...!
Wednesday, March 30, 2011
Mickey Cookies


Tuesday, March 29, 2011
I Know What I Did Yesterday :p
First, making a needlebook. I saw the one belongs to my mother-in-law, a simple needlebook with waterproof cover. It looked nice and very useful, especially with a toddler running around & taking everything she sees (for example, a pin cushion). Another thing, lately I like to take my sewing projects to my in-laws' house during our visit. So, it would be great to have one needlebook in my bag, but of course, I didn't want to buy (LOL).
Then I made one with all fabrics that I had at home. I used a piece of cotton fabric in polkadot as the outer, felt fabrics for the inside parts, and ribbons. I also used a piece of carton paper from a book delivery package to be put between the cotton and the red-color felt (note. used cardstock, pake karton bekas).

Second, I finished the little tote that I made for my lil one. This is the second tote bag I created from the scrap of jeans pants (see this blog). I started to sew the bottom part couple weeks ago, then put the pinky felt straps (handsewing) last week-end. It already looked pretty, actually. But too simple. So I added the polkadot fabric to cheer up the day :p

After, I cooked for lunch. It was not too special but healthy: rice, veggies and tofu (no photo, sowry :) ). At the same time, I prepared all things for baking some carrot cupcakes. I decorated a bit with pink almond paste (pate d'amande) in Mickey's head shape. Hm, that was a trial session, for the real Mickey-Minnie theme party in 2 weeks :D

Ok, done... :p
Friday, February 18, 2011
Les Madeleines
Dan inilah hasilnya...

Menurut suami, madeleine ini enak. Menurut saya juga lumayan lah... buat cemilan sore. Namun masih kurang mantap dibandingkan dengan Madeleine yg dulu suka kami beli di Les Halles Lyon.
Resep? By request ya. Soalnya masih dlm bhs Perancis, blm sempat diterjemahkan :)
Tuesday, January 18, 2011
Crème Caramel

Saya termasuk pencinta crème caramel namun sering ragu2 utk membuatnya sendiri. Mungkin karena dulu jaman saya kecil, ibu saya pernah membuatnya dan caramel-nya keras membatu. Jadi, di bagian itu, terbilang gagal. Mungkin pengalaman tsb menjadi semacam warning bagi saya yg menandakan bhw membuat caramel itu sulit. Namun kalau diingat2 lagi, jaman SD pula saya sering bereksperimen membuat caramel dgn gula pasir, sendok stainless steel dan lilin. Jadi, sendok berisi gula pasir saya pegangi di atas api lilin. Dan selalu berhasil. Caramel yang telah jadi biasanya saya tuang ke lantai yg sudah bersih, dibuat kepingan2 kecil, dan kemudian saya menunggu sampai dingin. Bila sudah dingin, kepingan caramel itu saya masukkan ke mulut, happ... Enak... ^_^
Enough talking. Now about the main subject.
Berhubung gengsi utk meminta resep andalan ibu mertua, dan kebetulan ada buku resep bonus dari majalah Marie Claire Idées edisi akhir tahun lalu, jadi saya pikir lebih baik jajal crème caramel dari buku tsb saja. Sekalian ngetes, resepnya benaran enak atau tidak.
Pertama mencoba, semua sudah sesuai instruksi. Untuk urusan bikin caramel-nya, saya memantau panduan di site David Lebovitz. Sukses! Kemudian semua berjalan sesuai resep.
Setelah oven berbunyi, ternyata crème caramel masih liquid sekali. Bahkan konsistensinya masih di bawah vanilla flan-nya sobat suami. Akhirnya saya browsing2 di Youtube dan mengulang2 semua bagian di video ini untuk mencari tahu dimana kesalahan saya (or, resep). Sampai midnight, saya masih mantengin Youtube :D
So, keesokan paginya, saya putuskan recooking. Maksudnya, saya masukkan lagi wadah crème caramel ke oven dengan suhu lebih tinggi, yaitu 180 dercel, dan lamanya 1 jam (di buku resep 45 menit, 160 dercel). Air utk bain-marie, saya didihkan dulu spt dalam video Youtube (link di atas). Dan hasilnya... syukurlah... Okeh!
Untuk crème caramel pertama saya ini, saya tidak menggunakan cetakan2 kecil untuk mempersingkat waktu. Apalagi saya tidak menemukan cetakan2 Serikaya yang sesuai utk "saudara"-nya ini (hm, mungkin ada di salah satu box di gudang, belum dibongkar paska pindahan).
Walau tampilannya agak brulée, namun saya suka sekali rasanya. Tidak terlalu manis. Pas :)
Wednesday, January 12, 2011
Our New Year's Dinner
Everything was simple since we had limited time for the preparation and cooking. Still, it was fun!
So, these were all the food that we enjoyed during New Year's dinner, my first with my little family. In 2007 & 2008, I celebrated it with my hubby's friends in Paris. In 2009, with my Indonesian friends in Lyon (I was pregnant!). And then, 2010 was with my in-laws family in St. Martin d'Auxigny.
I love the simple event we made. And I really enjoyed working together with my family in preparing all of these. Next year, I hope it will be the same :) I know it doesn't look special, but it was very special for us.
Photos:
- starter: emping manis, spicy fried tofu, pumpkin soup
- main course: veggies fried rice, hot spicy egg (balado maksudnya), abon, emping, tofu
- dessert: mini cakes, decorated by my daughter :)
Wednesday, December 15, 2010
Barbie Cake

*copas dari blog saya yg satu lagi, per 5 Desember 2010*
Yah, segini deh maksimal usaha yg bisa saya lakukan. Di sela2 semua keribetan krn kondisi cuaca, kondisi kesehatan dan kondisi eneng kecil yg ampun deh ahh... akhirnya lewat juga hari ini dgn senyum lebar mbak Rara yg senang melihat kue permintaannya di depan mata.
Once again, happy birthday my big girl. Lots of prays for you, Dear...
PS. Bahan utk covering cake-nya dari pâte d'amande, cetakannya dari Wilton.
Once again, happy birthday my big girl. Lots of prays for you, Dear...
PS. Bahan utk covering cake-nya dari pâte d'amande, cetakannya dari Wilton.
Friday, November 26, 2010
My First Choco Macarons

Hasilnya? Not bad... Cuma bentuknya saja yg blm seragam :)
Sisa Ganache bisa dibuat Cake Pops Look-alike dengan bahan: cupcakes dan butir2 gula dekorasi kue. Thank's for the idea, Sukie!
Sunday, October 24, 2010
Potimarron Apple Muffins

Another muffin recipe from Weelicious was attracting me. It's Pumpkin Apple Muffin. Since I had potimarron at home, I used it to make this delish food. I did not use honey as listed in the original recipe. I replaced it with canne sugar 9 tbsp. Then, I sprinkled a bit of crumbs over each muffin. I made the crumbs based on the recipe from the previous blog, Banana Crumb Muffin by Allrecipes.com.
Okey, other adaptations: I didn't use whole wheat flour, pumpkin spice (but I put some cinnamon and nutmeg), and I made my own purée from my baked potimarron (not a canned pureé).
I love this recipe! My kids love the muffins. Thank's Weelicious... You're one of my favorite site for a healthy cooking ^_^
Saturday, October 23, 2010
Choco Banana Muffins

Dua minggu ini, saya bolak balik membuat cemilan berbahan dasar pisang. Pertama, pisang digoreng dgn butter, kemudian disajikan dgn karamel. Kedua, pancake pisang yang juga dihias dgn karamel serta coklat. Terakhir ini, saya membuat Choco Banana Muffin yang resep aslinya adalah Banana Crumb Muffin dari Allrecipes.com.
Pertama membuat adonan, saya menuruti resepnya 100%. Kemudian, malamnya saya membuat lagi dgn takaran tepung dan butter sesuai keinginan saya. Gulanya juga begitu. Baking soda tidak saya berikan, namun menambah takaran baking powder. Deg-degan menunggu hasilnya. Takut kurang enak atau gimana gitu... Si kecil yang excited sekali menanti muffin siap, sambil sesekali menunjuk2 dan mengintip oven :)
Begitu timer berbunyi, saya menunggu sebentar utk mencicipi. Ternyata, lebih empuk!! Enak sekali. Seriously! Bangga, tapi kemudian sedih krn saya khawatir tdk bs membuat lagi dgn keempukan yang sama. Anyway, saya sudah membuat catatan di blog ini, semoga nanti bisa membantu ingatan saya :)
Love my muffins!
Friday, July 30, 2010
Oatmeal Wheat Germ Cookies

The original recipe was from Super Baby Food book by Ruth Yaron, but it's written Oatmeal Wheat Germ Crackers (p.333). In my version, I modified some ingredients and some quantities.
- 21 tbsp oatmeal (in powder)
- 3 tbsp wheat germ mixed with brewer's yeast (it's one package bought in an organic store)
- 3 tbsp Indonesian palm suiker (palm sugar)
- 4 tbsp butter, melted
- 3 tbsp organic milk
Preheat the oven 165 Celcius. Mix all the ingredients, then form into shapes that you want. Bake for 15 minutes. Et voila!
I'm happy that my baby loves these cookies!
Subscribe to:
Posts (Atom)